Showing posts with label Cake-ish. Show all posts

Sunday, May 10, 2009

For Mother's Day: Blueberry Cream Cake

So~ my mom loves blueberries, which is interesting because she wasn't always a fan of fruits (didn't know this until I was older; her reasoning was that if she showed that she didn't like most fruits or veggies we would grow up like her too, lol). Anyway, so I was supposed to make this the day before Mother's Day but I didn't have the ingredients to do it and in the morning I didn't have enough time to bake before she came to my appartment.


This was an experimental cake too. Aren't experiments just the greatest? Yes, back on track. It's experimental because I used heavy cream for fat instead of butter. I did some googling to figure out if such a substitute was reasonable, but didn't come up with too much except one recipe for a "Sweet Cream Cake." So I took that one, wrote a few
tagline notes and went at making my Mother's Day cake, hoping for the best results of course.


Lucky me, it turned out great!
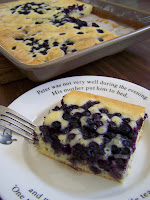

Blueberry Cream Cake

-1 2/3 Cup All Purpose Flour

-2 1/2 Tsp. Baking Poweder

-2/3 Tsp. Salt

-Zest from 1 Med. Lemon

-2 Eggs

-1 Cup Sugar

-1 Tsp. Vanilla Extract

-Just a bit over 3/4 Cup Heavy Cream + 2% Greek Yoghurt (or more cream or another sour cream, etc.) = Total 1 Cup

-2 Cups Frozen Wild Blueberries

  1. Preheat oven to 350 F. Line, spray, and flour a 9x12 baking pan.
  2. Beat eggs until well broken up, then add sugar gradually and beat until light in color and well incorporated. Add lemon zest and beat until incorporated.
  3. Sift flour, baking powder, salt together into a separate bowl. Combine vanilla extract, heavy cream/yoghurt mixture together in a measuing cup (for ease of pouring).
  4. Alternately add dry and cream mixture to the egg mixture (about 3 sets) and, using a paddle, mix after each set of additions until nicely incorporated. Pour and spread in an even layer onto the baking pan. Distribute the blueberries over the cake batter, leaving some on top and pushing some into the batter itself so there is a nice distribution throughout. (I guess the alternative would be to coat half of the frozen blueberries with flour and mixing them carefully into the batter to avoid major color bleeding, then sprinkle the rest on the top after spreading it out).
  5. Bake on middle shelf for 25-30 minutes or until toothpick inserted in the center comes out clean. Rotate once during baking. (If necessary, turn the oven to 325F 10 minutes before time is up if you feel your oven is browning/burning it faster that it is cooking and bake until toothpick inserted in center comes out clean.)
  6. Remove and let cool for 30 minutes in pan before cutting. Serves ~12-18 depending on how you slice it.

Enjoy~

Sunday, April 20, 2008

No Frosting Necessary

I don't understand why people would want to frost the hell out of a perfectly good cake. I mean, if the cake itself is good, they why do it? And if you do, why make it so thick? I had a cake once that had saccharine frosting that was layered on so thick that my head felt like it was going to implode from all my blood vessels constricting.

That's my rant for the day I guess. Anyway, on to the main point. I finally bought a cake pan; a 9" Wilton round cake pan. It took me forever to decide to actually buy one and then after that it took another eon for me to select a particular brand. Therefore, I decided to buy the Wilton nonstick 9" round, since they come with lovely handles for easy manipulation. I only bought 1 though since at that point I still wasn't sure if it would be a good choice or not, and about $5-$6, it was worth a risk. When I finally used it to bake a cake, it worked perfectly. It browns the bottom and edges a dark brown, which has great flavor and a firmer, almost crisp, crust. The handles made turning during baking and handling overall a lot easier too. Good surface. With a light run around the sides with a spreader, the cake almost seemed to fall out of the pan.


On to the recipe itself. I used and adjusted a basic One-Bowl Chocolate Cake from Better Homes and Garden's New Cook Book; however, I didn't do it all in one bowl. I just kinda did mine in steps since I don't have an electric mixer. If I did I might have done it all in one bowl...but ya~

For this recipe I had to buy some cocoa powder, so I settled for Dutch processed. The original recipe I followed only called for milk, so I used 2% milk and I added some sour cream, which is supposed to add tenderness (that line sounds kinda weird, doesn't it?). Another thing was that the cake came with a Rocky Road Frosting, which I decided not to try since I don't really like frosting on my cake. Turned out I was right in doing this because it needed no frosting what so ever. It was moist, just sweet enough, and perfect just by itself.


I believe a good cake can hold it's own~ Though it is true frosting makes it more presentation quality. In those cases, I would make a special, mildly sweet, and frost on only a thin layer.
Makes one 9" round layer
  • 1 cup all-purpose flour
  • 1 cup sugar
  • 1/4 cup unsweetened cocoa powder (Dutch processed makes for a darker, less red, cake)
  • 1 tsp baking powder
  • 1/2 baking soda (originally: 1/4 tsp)
  • 1/4 tsp of salt
  • 1/2 + 1/8 cup of (2%) milk, room temp
  • Enough (light) sour cream to make milk total: 3/4 cup (a little over 1 tbsp)
  • 1/4 cup butter, room temp, and cut into 8 cubes/pieces (originally: margarine)
  • 1 tsp vanilla extract
  • 1 egg, room temp
  1. Preheat oven to 350F
  2. Spray a 9" round cake pan with cooking spray, line the bottom with parchment, spray bottom again, and lightly flour pan. Set aside. (I just spray it all once, put the parchment on the bottom, touch it till it gets oil all over the one side, and then flip it around and press in against the pan).
  3. Use scoop and level method (scoop out an overfilled amount of flour and level) and to measure out one cup of flour. Mix by first stirring flour, cocoa powder, baking powder, baking soda, salt, and sugar together in a bowl, then sift 1-2x, using another bowl between transfers. Set aside
  4. In another bowl (if you used another bowl when you were sifting the dry ingredients back and forth, use the empty one you have after step 3) mix the eggs, vanilla, milk, and sour cream together until well blended/mixed. Set aside
  5. Using a whisk, add 2 cubes of butter into the dry ingredients at a time and mix by pressing the butter into the dry ingredients until all the butter is distributed in the dry ingredients and are about the size of small rocks. Add half of the wet mixture into the dry ingredients, whisk rather vigorously until the dry ingredients are all incorporated (~20-30 seconds). Then, mix in the rest of the wet mixture until a smooth batter forms. Scrap the bowl down and mix w/ just a few more turns.
  6. Pour batter into prepared pan. Even out the batter and put bake at 350F for 30-35 minutes, or until a toothpick inserted in the middle comes out clean. (Remember to turn the cake around 1/2 way through baking, so as to ensure even cooking).
In the end, I think you can use any method you want to mix this cake up, providing you are using some type of cake making method. I hope this works out well for everyone who decides to try it. if you really wanted to, you could even frost it...if you want to. I personally feel its perfect the way it is ^_^. Time to study for my Calc and Chem midterm!...crap~

Sunday, April 6, 2008

Marbled Matcha Tea "Cup" Cake

I wouldn't consider this a cupcake persay, because the final product doesn't really fit the criteria for a cupcake. It isn't sweet, and has a denser texture; however, I did baked them in a muffin tin with paper liners so they do kind of look like cupcakes...and kind of like muffins.


They turned out good: pleasantly mild bitter taste and sweetness. The difficult part about this recipe though was that the chocolate batter had a consistency similar to cookie dough, but still workable.

I was inspired to do something with chocolate and matcha a while back, but after watching the movie "Chocolat" this morning I just had to do something with chocolate ^^. Some unsweetened baking chocolate from Trader Joe's, a good amount of green tea powder, what could be better ^_^.

Generally, I just break the chocolate up with my hands into the pre-divided sections and don't bother to chop it with a knife, but made the exception today since I wanted to melt the chocolate faster. A serrated knife cuts through bar chocolate like nothing else! And your less likely to damage the knife's edge compared to using a chef's knife. Loved it @_@.


I think this cake concoction would go well with a sweet beverage of some sort. I just tasted them with milk though, but I think a hot chocolate would have been good too, since the cakes aren't very sweet. One thing to keep in mind, however, is that the two different batters rose differently. Since the chocolate batter was more cookie dough-like, it didn't rise as well as the matcha batter. Also, while the matcha batter would fill out evenly into the paper liner when baked, the chocolate one didn't fill out as nicely (as you can see from the photo's). I don't mind though. It's all still good.


I'll put up the recipe I made up later on. For now, I really need to study ^^;